

.+PART TWO+.
Shit this is the home stretch, from here we are just going to add our cores and games, pick up some box art, and get to playing.We will be continuing from 25 minute mark of the Retro Game Corp Retroid Pocket 2+ Starter Guide, and through the second video. However, since these sections are much less tedious we won't have to cover ever single step. Instead, we will cover how to add a core, how to add games, and note any differences to watch out for that are uniqe to a specific console.

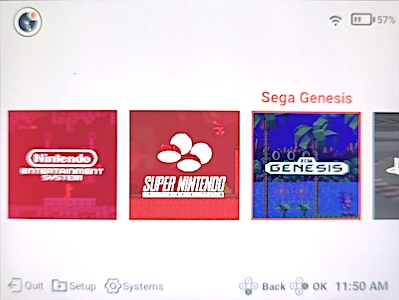
RetroArch now covers Sega Genesis, so you don't have to follow the playlist instructions for these systems. Instead, youre going to add them the same way you add the other consoles. I did this, and they are working just fine!

I took these "screenshots" with my phone and they are a bit shit. dont hate. i did my best.
ADDING CONSOLES TO EMULATION SCREEN
24:00

From Retroid Launcher, tap 'Emulation' at the bottom of the screen
Tap Systems
Check each console in the order you want it to appear, pressing OK after each system and repeating process until finished.
SETTING CONSOLE CORES
From this screen, tap the console you wish to edit, or select it and press A

Press Edit at the bottom of the screen
Make sure the following cores are set for each console:
| Console | Core |
|---|---|
| Gameboy | RetroArch (Gambatte) |
| Gameboy Color | RetroArch (Gambatte) |
| Gameboy Advance | RetroArch (mGBA) |
| Nintendo | RetroArch (FCEUmm) |
| Super Nintendo | RetroArch (Snes9x Current) |
| Nintendo 64 | Mupen64Plus FZ |
| Sega Genesis* | RetroArch (Genesis Plus GX) |
| Sega CD* | RetroArch (Genesis Plus GX) |
| Sega 32X | RetroArch (PicoDrive) |
| PlayStation | RetroArch (PCSX ReArmed) or Duckstation** |
| PlayStation 2 | AetherSX2 |
| PSP | PPSSPP |
| Dreamcast | Redream |
| Gamecube | Dolphin Emulator MMJR2 |
* Sega Genesis and Sega CD are now supported on RetroArch, so you do not need to follow the Playlist instructions in Video 2.
** Use Duckstation if you dont want to bother with the filters, or if you have any games that are flashing wildly and look unplayable, try opening them with Duckstation, that has worked for me.
ADDING CONSOLE GAME ROMS

From the console page, tap Roms at the bottom of the screen
Press 'Add' in the pop-up menu
 Select 'Disk'
Select 'Games/'
Select '[CONSOLE]'
Tap 'SELECT (1)'

 check box of the file path
Press 'Scan'
 Everytime you want to add extra games in the future, this file path should already be selected, so you will just tap 'Roms' and then 'Scan'.
SETTING BOX ART
 YOU WILL NEED TO BE CONNECTED TO WI-FI FOR THIS STEP
Long-press on any icon displaying a single letter in a colored circle
Try 'TheGamesDB' first
Retroid will automatically enter the game name into the search field
scroll down to see results
Find the boxcover you want
Longpress the image
select 'Download image'
If there are no results, press B to go back
Select Box Cover again
Choose Google Images
Feel free to ammend the search term
Longpress the picture you want
select 'Download Image'
Press B to return
the image you just downloaded should automagically be added to the game!
FIXING THE '.' PROBLEM
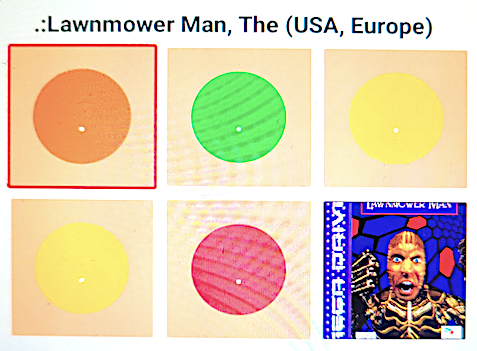 *
*If you open your console page and see a lot of game tiles with a '.' in them like this, odds are youre probably using a Mac. For some reason Mac OSX adds these weird empty ghost name duplicates, but don't worry, it doesnt mean youve written over twice the amount of diskspace (your files arent being duplicated), and it's an easy fix.
Storage Select 'disk' get into your folders select and deleteSupposedly there is another solution, where you enter a few commandlines in Terminal? But for now this seems to be the easier way of doing it, since... Terminal.*dont judge me for downloading Lawnmower man, I thought it might be cool
REMOVING THE ONSCREEN OVERLAY (RETROARCH)
26:10 (Part 1)
Open RetroArch-64 rom Retroid Launcher, or, press B once or twice to exit out of a console page and return to the Retroid LauncherGo to Settings (2nd Column)
 On Screen Display On Screen Overlay Toggle 'Display Overlay'
Press B or back button on D-Pad until you return to Main Menu (1st Column)
 Scroll down to 'Configuration File'Select 'Save Current Configuration'
Return to Main Menu column and select 'Quit RetroArch' or press HOME button next to START & SELECT
EXTRA CONSOLE INTRUCTIONS

Gameboy

Changing Colorway
Options
Gameboy colorization
Toggle to 'Internal'
Select 'Internal Palette'
(PALETTE SAMPLES HERE)
Ghosting
creates a motion blur look similar to original gameboy
toggle 'Interframe Blending'
select 'LCD Ghosting Accurate'
creates a motion blur look similar to original gameboy
Enabling Rewind
Select Rewind Toggle Rewind SupportPress B to return to Quick Menu
 Select Overrides Select 'Save Core Overrides
*this will bring up extra console/game specific menu options that wont be available when you open RetroArch Menu directly

Nintendo 64
Open M64Plus FZ (aka Mupen64) appAdd games, dont worry about box art.
Return to RetroArch and open N64 Tile, add games and make sure the core is set to Mupen64Plus FZ
On screen control overlay will appear at first, but disappears after 5 seconds, you can change this to disappear even faster:
Press ☰ in upper left hand corner
Settings Touchscreen Number of seconds before hiding touchscreen. Set to 1 or 2 seconds

Nintendo DS
[Requires DraStic Emulator ($5USD)]
Select 'Load Game'
the app should automagically find your NDS folder
Removing On Screen Overlay
Choose and start a game, any gamepress the bottom center button under the controller graphic
select 'Menu' at the bottom center of the circle
OptionsVirtual Gamepadscale controller opacity to 0%
press B to return to previous menu
Mapping Controls
External Controller press on 'Select Key Mapping' at the top of the menu (highlighted in light blue) choose 'no mapping' tap 'map control' (dark teal button)Follow prompts for button mapping
Return to previous menu

This is what you will use to view games in full screen!
On the same menu screen, press Map Special
select L1 or L2 as a trigger for screen swap
select R1 or R2 as a trigger for half-screen swap
Return to previous menu
Extra Settings
Video change frameskip from auto to none toggle high-resolution 3d rendering to on

Dreamcast
open Redream app(you dont have to upgrade but if you can afford it, be cool and support)
add your roms per usual
go to input and select Port A
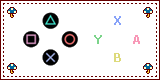
map buttons, making sure that you account for Dreamcast's button names being backwards to Retroid's
| Dreamcast | Retroid |
|---|---|
| A | bottom (B) |
| B | right (A) |
| X | left (Y) |
| Y | top (X) |
Once you change A or B their functions swap so B will become select instead of "back"Exit and add games to Retro Arch, core set to Redream
I have found most games to work on Redream, but games that require a mic (aka Seaman), work best with Flycast.

PSP
open PPSSPP
go to settings on left
Backend Set to Open GL
go to Controls Tab in Menu
Control MappingChange game buttons to the following:
change Rendering Resolution to 2xPSP;
I left mine on 1x to avoid future problems because i downloaded a lot of weird PSP titles.

Playstation 1
Setting Up Duckstation
Mapping Controls
Go to Port 1 (2nd Column)
Map buttons accordingly, and make sure to include the D-Pad!
Press Save
Create a Profile Name
 when I open Duckstation I was prompted to add my games right away. at this point you should be good at pointing an emulator to your games folder. I also want to add that I have found Duckstation to work whenever PCSX ReArmed does not.
BIOS
Select Start BIOS
Press Yes
Select Menu in upper left hand corner
Select Disk Games BIOSscph1001.binTurning Off On Screen Overlay
from gameplay, press pause Tap Pause in upper right hand corner to bring up MenuPress Setting icon
Toggle 'Auto Hide Touch Screen Controller'
Mapping Analog Sticks
The following will only work with later PS1 games
tap control pad icon in upper right corner
Select Port 1 (2nd Column) select Controller Type select Dual Shockscroll down, and map accordingly,
noting x & Y indicate axis:
LeftX=Left
LeftY=Up
RightX=Right
RightY=Down
Controls Port 1 Controls Device Type StandardPress Back
Select Analog to Digital Type Select Left Analog

GameCube
Dolphin MMJR has been renamed to Dolphin for Handheld
The following assumes you have already downloaded the community config files***
add gamecube games by pressing 'Plus'
add directory
Exit Dolphin
Go to Files app (via ADSP launcher)
press menu button on left
select Retroid Pocket 2+
select Dolphin for Handheld
select Config
Longpress Dolphin.ini and GFX.ini files, hit Trash
open menu again
select disk/Games/Gamecube
long press the same titles, Dolphin.ini and GFX.ini
select 'Copy to' by pressing the three dot menu in upper right-hand corner (next to Trash)
Press menu on left upper corner
return to Retroid Pocket 2+, Dolphin for Handheld, Config directory
press 'Copy to' button at bottom of the screen.
Why do we do this?
Dolphin is an app made to run on Android, and assumes a smartphone processor, these configuration files are specifically for the Retroid, and will deliver the best performance.
Certain games have different settings for optimal run, which you can check on this spreadsheet and adjust by entering Quick Settings from the menu screen during paused gameplay (access menu by swiping up for bottom menu bar, and pressing back)

Playstation 2
AetherSX2
under settings opening screen select Fast/Unsafe Defaults (fun!)
Import Bios from your PS2 folder, using the file that ends in ROM.1
Add games through normal process
press finish
go into App Settings
For updated versions of Aether, Enable Frame Limit will be under the System Tab, toggle to ON
Other Settings
EECycle Skip to Maximum
Removing On screen Overlay
From first gameplay, pause, and select controller icon,
Add/Remove buttons
Uncheck all except Pause
